Add Shipments in Route Planner
What are Shipments?
Each shipment has a pickup and a corresponding delivery step. Shipments can be used to model real-world scenarios such-as food delivery, ride hailing, or third-party logistics, where specific items or persons are picked-up from a location and then delivered to another location. Details such as time windows, service times, priority, or required skills can be specified to further model actual constraints for completing the shipment.
How to Add Shipments in Route Planner?
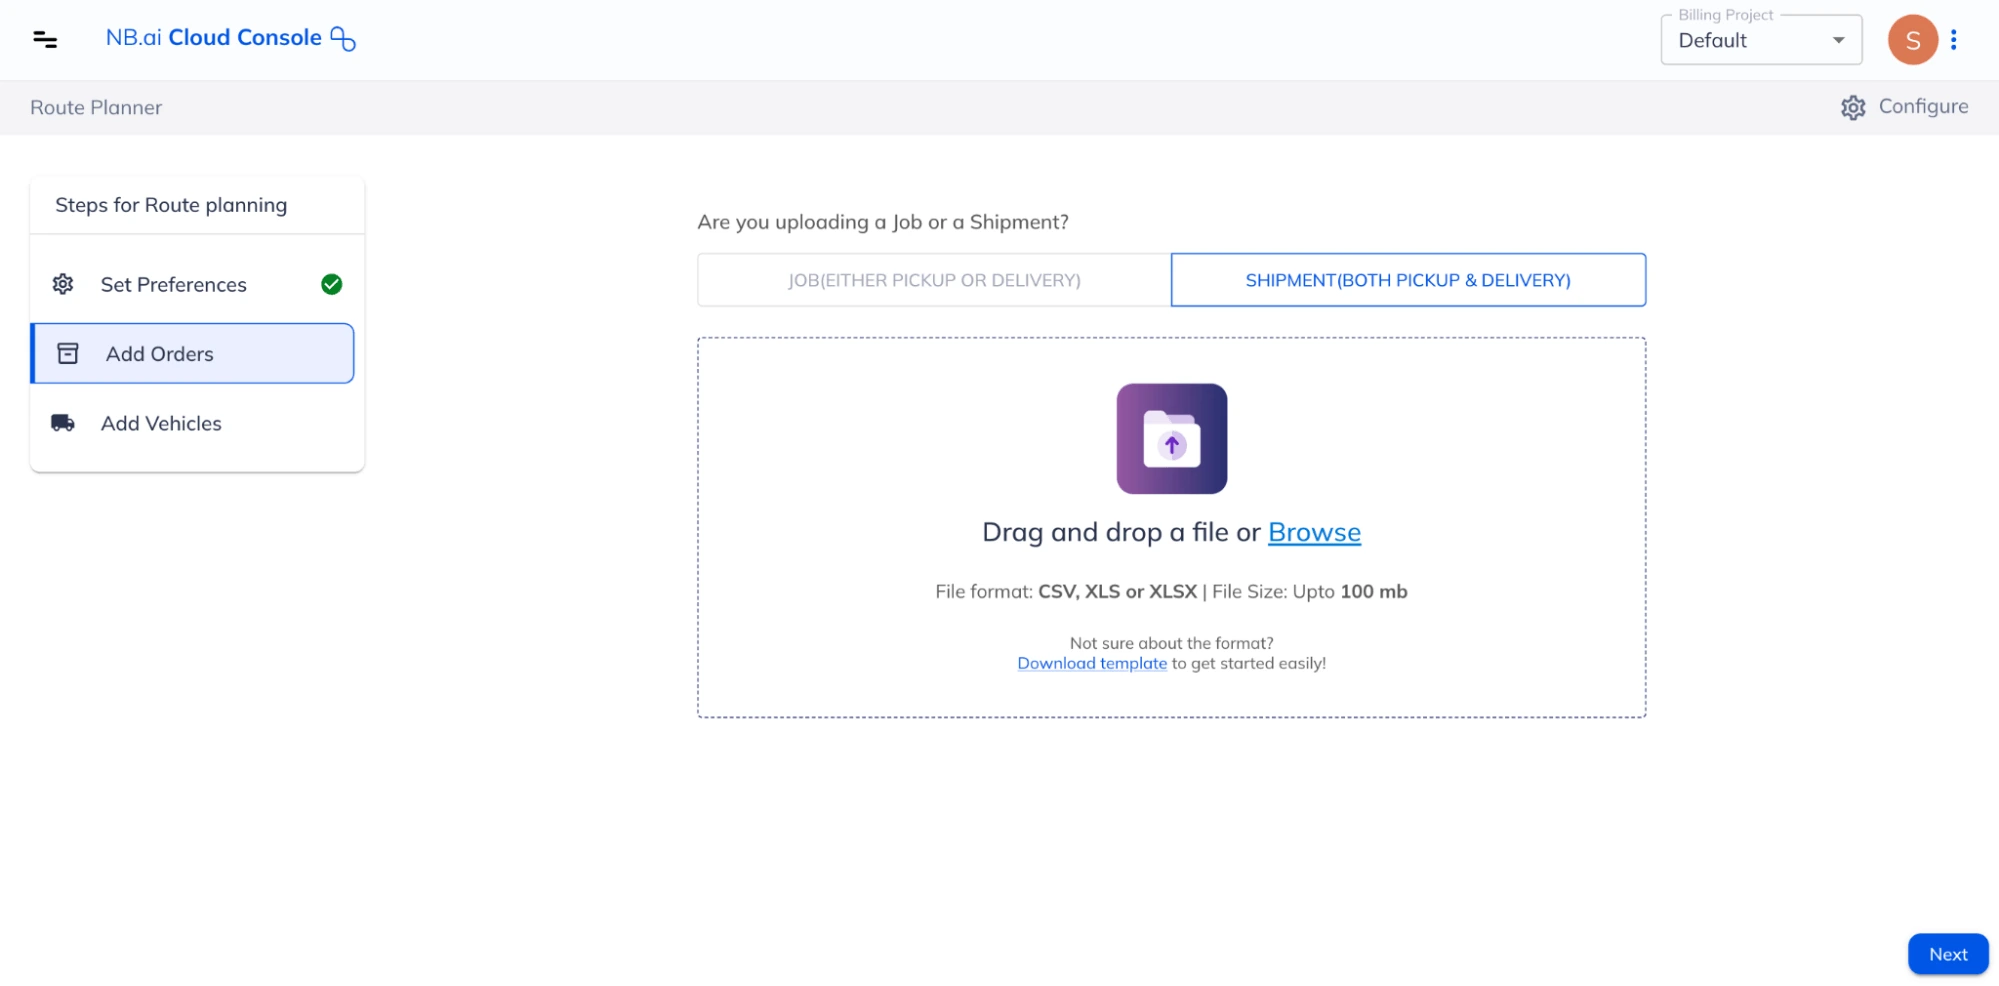
Route Planner can optimize a large number of daily shipments through data imports. You can input data by either downloading and modifying a sample file template or uploading your own file in any of the supported formats - CSV, XLS, XLSX. Go through the Shipments Files - Input data fields and formats section to learn about data fields and formats supported in the shipment file.
Once a Shipments file has been initially imported and its attributes mapped, the Route Planner will automatically map those same attributes in all subsequent imports of that file.
Following is a quick walkthrough of the process to add shipments in Route Planner:

Shipments Files - Input data fields and formats
To add shipments via a file, it is essential to ensure that the data within the file adheres to the necessary format. Following are the details of all the data fields supported in Route Planner:
| Item Name | Required | Description / Examples |
|---|---|---|
| Description | No | Any custom description for the vehicle. It should only be in text. |
| Skills | No | Specify the skill needed to perform this shipment. When optimizing, the app will assign the shipment to a vehicle having all the required skills. Accepts positive integers only. Specifying different skills for pickup and delivery steps is not allowed. Example: 110 |
| Priority | Specify the priority of this shipment. The valid values are in the integers in the range of [0, 100]. Setting a priority will only decide whether this job will be assigned or not, but has nothing to do with the sequence of job fulfillment. Example: 95 | |
| Pickup ID | Yes | A unique identifier for the pickup step of each shipment. Supports text values. Example 1: “123” Example 2: Pickup 1 |
| Pickup Service | The time required to perform the pickup step, in seconds. Accepts positive integers only. Example: 180 | |
| Pickup Location | Yes | Provide the pickup location coordinates. You can either provide the latitude and longitude coordinates in separate columns or both of them together in a single column. While mapping, use the correct map keys to reflect the way in which locations have been added. |
| Pickup Start Time | The start of the time window after which the pickup can be performed. Format: YYYY-MM-DD HH:mm | |
| Pickup End Time | The end of the time window before which the pickup has to be started. Format: YYYY-MM-DD HH:mm | |
| Pickup Setup | Specify the time needed to complete the necessary setup before/after performing the pickup, in seconds. This can be used for any one time activity like parking, or recording information for compliance etc. Please note that setup time is applied only once for a given job location. Example: 120 | |
| Delivery ID | Yes | A unique identifier for the delivery step of each shipment. Supports text values. Example 1: “123” Example 2: Delivery 1 |
| Delivery Service | The time required to perform the delivery step, in seconds. Accepts positive integers only. Example: 180 | |
| Delivery Location | Provide the delivery location coordinates. You can either provide the latitude and longitude coordinates in separate columns or both of them together in a single column. While mapping, use the correct map keys to reflect the way in which locations have been added. | |
| Delivery Start Time | The start of the time window after which the delivery can be performed. Format: YYYY-MM-DD HH:mm | |
| Delivery End Time | The end of the time window before which the delivery has to be started. Format: YYYY-MM-DD HH:mm | |
| Delivery Setup | Specify the time needed to complete the necessary setup before/after performing the delivery, in seconds. This can be used for any one time activity like parking, or recording information for compliance etc. Please note that setup time is applied only once for a given job location. Example: 120 | |
| Amount Capacities | The quantity of the items that need to be shipped. You can provide quantities in multiple units/dimensions (e.g., weight, volume etc) in separate columns and map these columns to “Amount Capacity 1”, “Amount Capacity 2” and so on while adding map keys. Supports integer values only. |
After adding the shipments, proceed to Add Jobs or Add Vehicles steps as per the requirement.