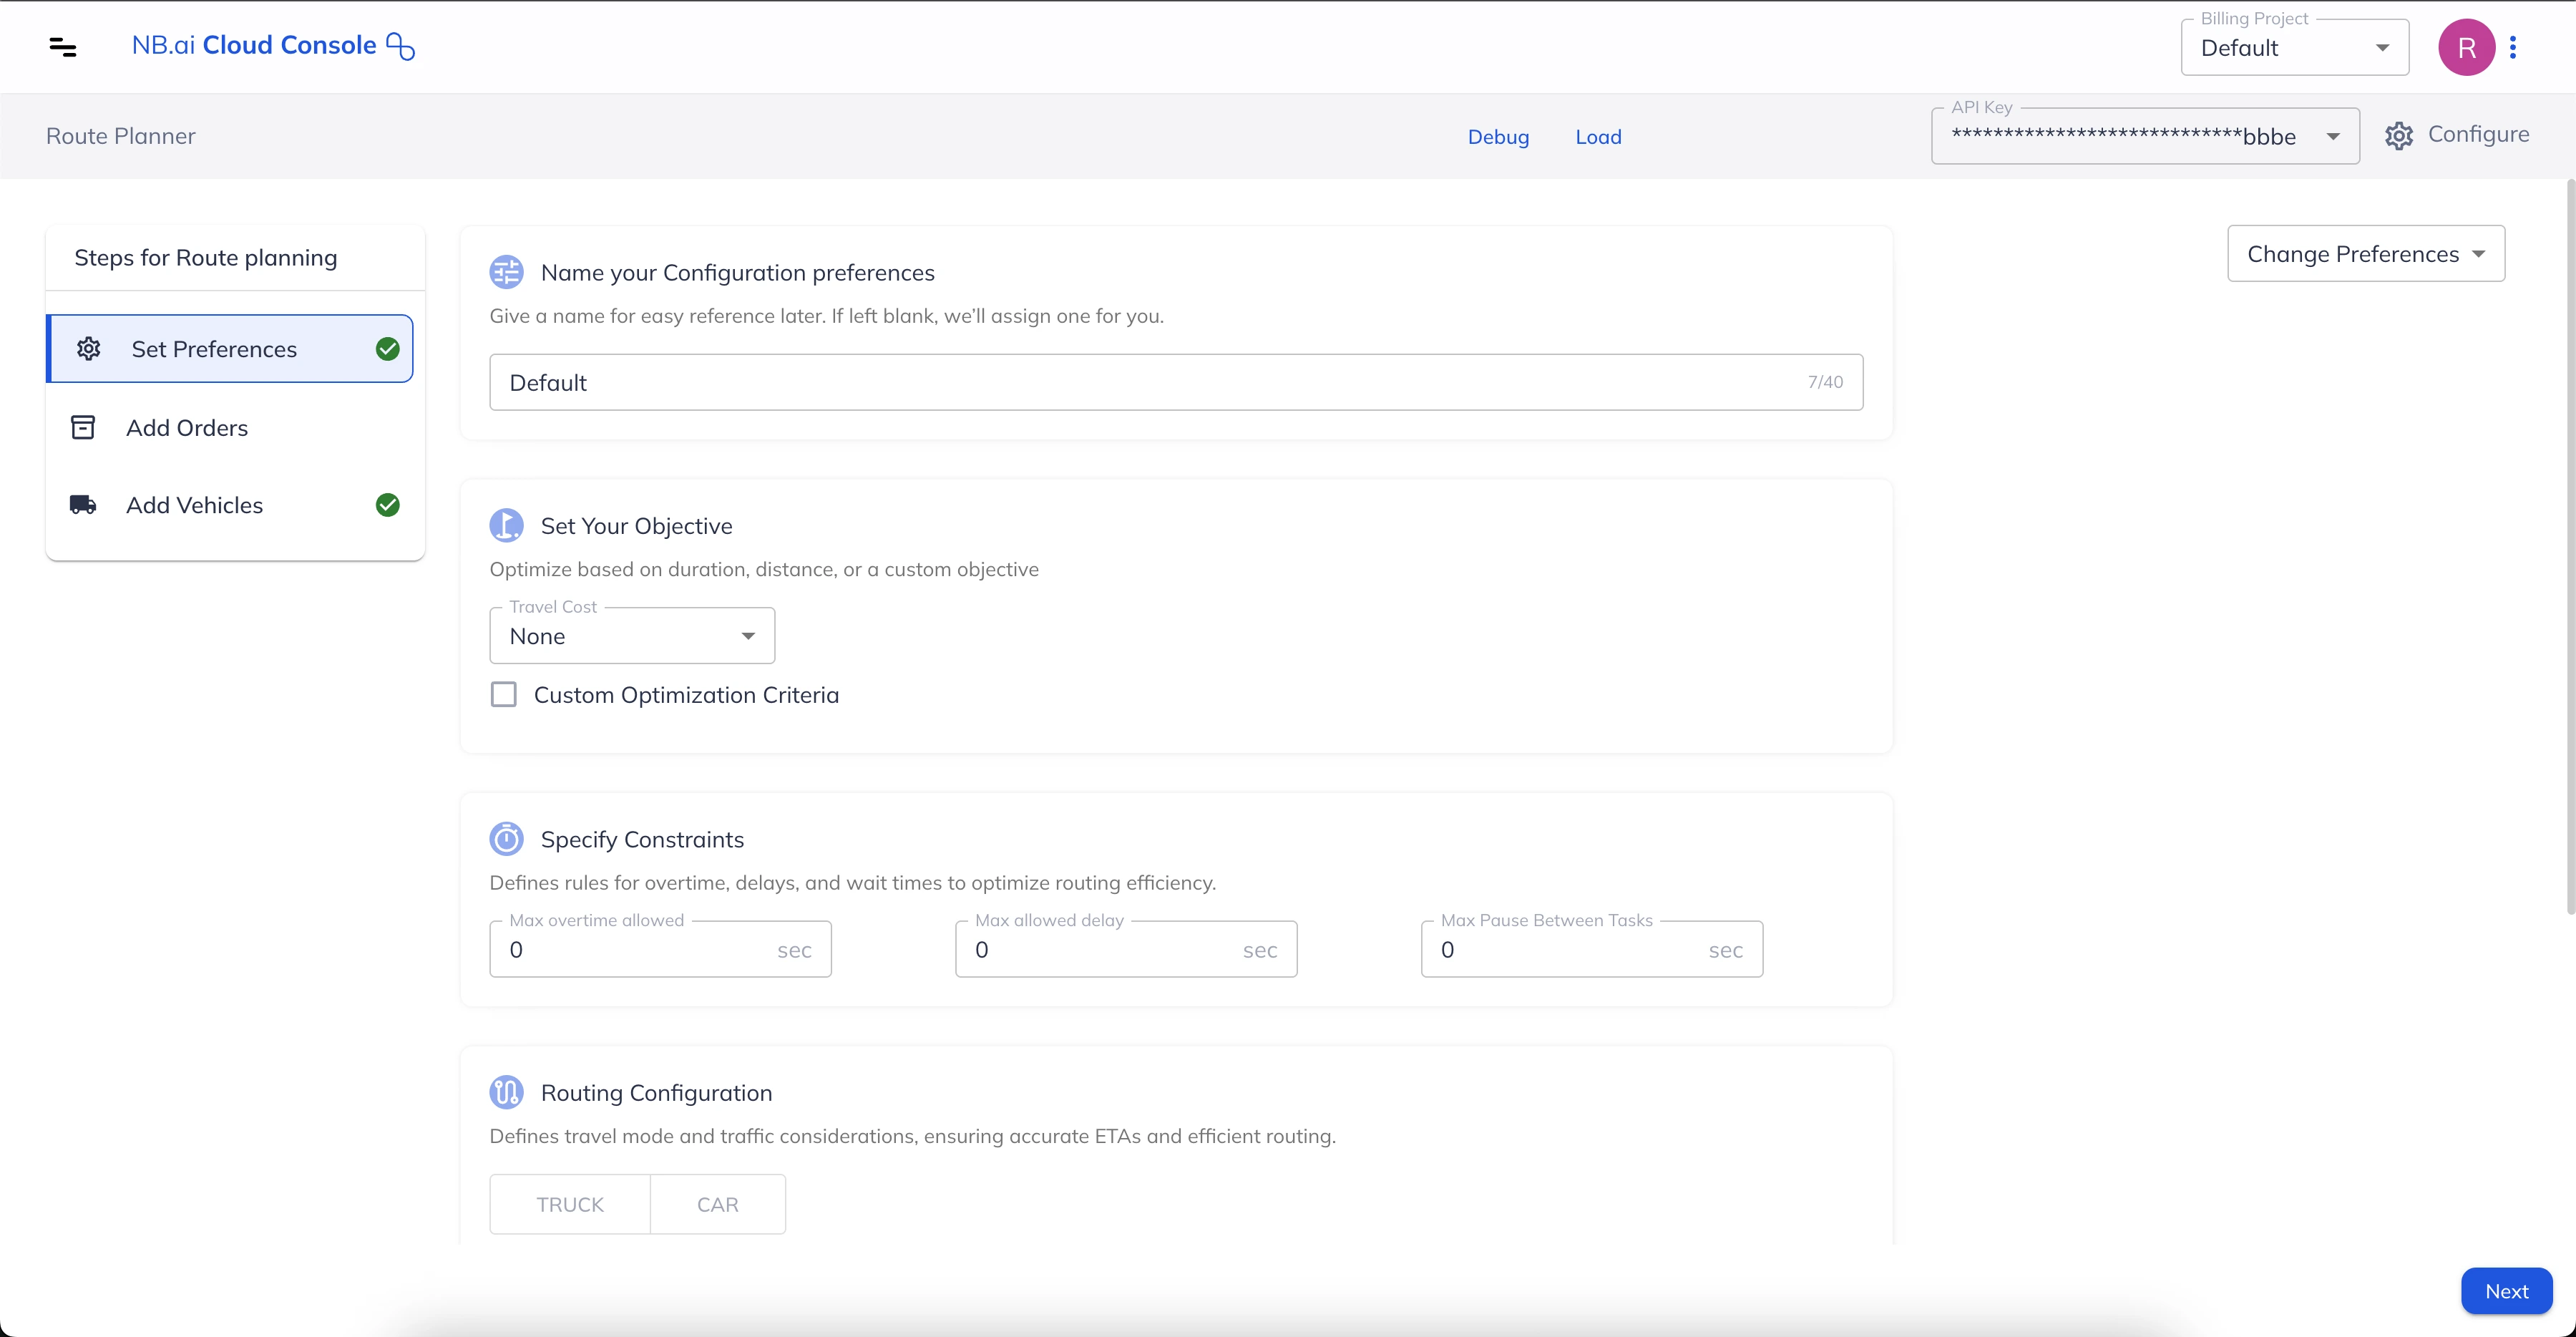
Route Planner
NextBillion.ai route optimization services provided two different methods to help optimize multi-vehicle routes
- Route Planner
- Route Optimization API
In this document we will explore the Route Planner web application and optimize routes using Excel or CSV templates as inputs.
How do I register?
In order to start using the Route Planner, you need to access the NextBillion.ai Cloud Console (NCC).
- Reach out to [email protected] to get an account created for your organization.
- Sign-up on NCC using the contact email address provided above.
- Once you are on the NCC dashboard, click on the manila icon at the top left corner.
- Click on Apps > Route Planner.
Once you are in the Route Planner app, reference the following sections to build a valid optimization request by importing the required information through CSV files.
First Route Planning using CSV files
Route Planner offers a simple series of steps to help you submit an optimization request by uploading CSV files for Jobs, Shipments and Vehicle and setting the related options through the UI interface. Let’s take a look at the steps involved, one-by-one, to submit a request.
Route Planner Import CSV widget
Step 1: Choose the API Type
NextBillion.ai Route Planner is built upon the Route Optimization APIs. In this step, users can choose one of the available endpoints to solve the request. Refer to respective API documentation of Fast and Flexible endpoints to know more about them.
Step 2: Upload “Jobs” CSV
We start building the optimization problem with “Jobs” data. If you have a large number of tasks planned for a given day, you can easily collate the necessary data in a CSV and import the file into Route Planner. This method ensures that all the jobs are accurately configured and available for route optimization.
Please note that uploading the CSV file for either one of “Jobs” or “Shipments” is required to submit a valid request. Following sections will guide you on how to prepare and submit a valid CSV file with your jobs data.
Preparing “Jobs” CSV
Before importing, ensure that the date in your CSV file is in the expected format. Following are all the jobs related fields, and their expected format, that Route Planner can process:
Item Name | Required | Description / Examples |
---|---|---|
Job ID | Yes | A unique identifier for each job. Supports text values. Example: 123 Example: Job 1 |
Description | Any custom description for the job. It should only be in text. | |
Location | Yes | Provide the location coordinates where the job needs to be performed. You can either provide the latitude and longitude coordinates in separate columns or both of them together in a single column. While mapping, use the correct map keys to reflect the way in which locations have been added. |
Service time | The time required to perform the job, in seconds. Accepts positive integers only. Example: 300 | |
Skills | Specify the skill needed to perform this job. When optimizing, the app will assign the job to a vehicle having all the required skills. Accepts positive integers only. Example: 110 | |
Start Time | The start of the time window after which the job can be performed. Format: YYYY-MM-DD HH:mm | |
End Time | The end of the time window before which the job has to be started. Format: YYYY-MM-DD HH:mm | |
Depot IDs | The IDs of the depots which can fulfill this job. In case of a delivery type job, only the vehicles which can start from one of the specified depots, can fulfill the job. On the contrary, a pickup type job can be fulfilled by only those vehicles which can end their route at one of the specified depots. If the job can be fulfilled by any one of multiple depots, add all such depot IDs in separate columns and use the map keys “Depot 1”, “Depot 2” and so on, as needed. Only integer values are supported. | |
Priority | Specify the priority of this job. The valid values are in the integers in the range of [0, 100]. Setting a priority will only decide whether this job will be assigned or not, but has nothing to do with the sequence of job fulfillment. Example: 95 | |
Setup | Specify the time needed to complete the necessary setup before/after performing the job, in seconds. This can be used for any one time activity like parking, or recording information for compliance, setting-up equipment. Please note that setup time is applied only once for a given job location. Example: 120 | |
Pickup Capacities | The quantity of the items that need to be picked-up for this job. You can provide quantities in multiple units/dimensions (e.g., weight, volume etc) in separate columns and map these columns to “Pickup Capacity 1”, “Pickup Capacity 2” and so on while adding map keys. Supports integer values only. Only one of Pickup Capacities or Delivery Capacities can be specified for a given job. | |
Delivery Capacities | The quantity of the items that need to be delivered for this job. You can provide quantities in multiple units/dimensions (e.g., weight, volume etc) in separate columns and map these columns to “Delivery Capacity 1”, “Delivery Capacity 2” and so on while adding map keys. Supports integer values only. Only one of Pickup Capacities or Delivery Capacities can be specified for a given job. |
Importing “Jobs” CSV file
On the file import widget
- Navigate to the Jobs section in the application.
- Click on the Upload a CSV button.
- In the pop-up window, select the CSV file with “Jobs” data, prepared as per the guidelines above.
- Click Open to start the import process.
Map Job attributes to CSV columns
After the CSV file is successfully imported, you need to match the different attributes of the jobs to the columns in the imported file. You can select the information a CSV column represents, from the corresponding “Map Key” dropdown. This ensures the data is utilized correctly.
Job attributes
Ensure that all columns are correctly filled with the right data and format, and there are no empty fields, as this may cause errors during import.
To reset the field mappings and create a new map between CSV and optimization fields click “Reset Field Mapping”. Else, click “Discard and Upload new file” to import a different file.
Once the mapping is complete click “Next”. If there are any errors in the CSV file, they will be highlighted for correction. Otherwise, upon a successful validation, the import widget moves to the next section.
Step 3: Upload “Shipments” CSV
Next, we will add any shipments that need to be scheduled in the optimized solution. This section will guide you on how to upload shipment details and customize individual settings for each shipment step to build all real-world constraints into the problem.
Preparing “Shipment” CSV
Route Planner expects certain necessary details about the shipments in the required format. Following section covers all the properties available for configuring a shipment:
Item Name | Required | Description / Examples |
---|---|---|
Description | No | Any custom description for the vehicle, maybe the name, label, function, vehicle type or anything. It should only be in text. |
Skills | No | Specify the skill needed to perform this shipment. When optimizing, the app will assign the shipment to a vehicle having all the required skills. Accepts positive integers only. Specifying different skills for pickup and delivery steps is not allowed. Example: 110 |
Priority | Specify the priority of this shipment. The valid values are in the integers in the range of [0, 100]. Setting a priority will only decide whether this job will be assigned or not, but has nothing to do with the sequence of job fulfillment. Example: 95 | |
Setup | Specify the time needed to complete the necessary setup before/after performing the shipment steps, in seconds. This can be used for any one time activity like parking, or recording information for compliance etc. Please note that setup time is applied only once for a given job location. Example: 180 | |
Pickup ID | Yes | A unique identifier for the pickup step of each shipment. Supports text values. Example: “123” Example 2: Pickup 1 |
Pickup Service | The time required to perform the pickup step, in seconds. Accepts positive integers only. Example: 180 | |
Pickup Location | Yes | Provide the pickup location coordinates. You can either provide the latitude and longitude coordinates in separate columns or both of them together in a single column. While mapping, use the correct map keys to reflect the way in which locations have been added. |
Pickup Start Time | The start of the time window after which the pickup can be performed. Format: YYYY-MM-DD HH:mm | |
Pickup End Time | The end of the time window before which the pickup has to be started. Format: YYYY-MM-DD HH:mm | |
Pickup Setup | Specify the time needed to complete the necessary setup before/after performing the pickup, in seconds. This can be used for any one time activity like parking, or recording information for compliance etc. Please note that setup time is applied only once for a given job location. Example: 120 | |
Delivery ID | Yes | A unique identifier for the delivery step of each shipment. Supports text values. Example: “123” Example: Delivery 1 |
Delivery Service | The time required to perform the delivery step, in seconds. Accepts positive integers only. Example: 180 | |
Delivery Location | Provide the delivery location coordinates. You can either provide the latitude and longitude coordinates in separate columns or both of them together in a single column. While mapping, use the correct map keys to reflect the way in which locations have been added. | |
Delivery Start Time | The start of the time window after which the delivery can be performed. Format: YYYY-MM-DD HH:mm | |
Delivery End Time | The end of the time window before which the delivery has to be started. Format: YYYY-MM-DD HH:mm | |
Delivery Setup | Specify the time needed to complete the necessary setup before/after performing the delivery, in seconds. This can be used for any one time activity like parking, or recording information for compliance etc. Please note that setup time is applied only once for a given job location. Example: 120 | |
Amount Capacities | The quantity of the items that need to be shipped. You can provide quantities in multiple units/dimensions (e.g., weight, volume etc) in separate columns and map these columns to “Amount Capacity 1”, “Amount Capacity 2” and so on while adding map keys. Supports integer values only. |
Importing “Shipments” CSV file
On the file import widget
- Navigate to the Shipments section in the application.
- Click on the Upload a CSV button.
- In the pop-up window, select the CSV file with details of your shipments.
- Click Open to start the import process.
Map Shipment attributes to CSV columns
Upon importing the CSV file successfully, users should match the available shipment attributes to the columns in the imported file. You can select the kind of information a CSV column represents, from the corresponding “Map Key” dropdown. This ensures the data is utilized correctly.
Shipment attributes
Ensure that all columns are correctly filled with the right data and format, and there are no empty fields, as this may cause errors during import.
To reset the field mappings and create a new map between CSV and optimization fields click “Reset Field Mapping”. Else, click “Discard and Upload new file” to import a different file.
If there are any errors in the CSV file or the mapping during the import process, they will be highlighted for correction. Once all the errors are fixed, the application moves on to the next section.
Step 4: Upload “Depots” CSV
Next, we will add details about the depots which act as starting and ending locations for your vehicles as well as fulfillment centers for the tasks. Following sections cover how to prepare and import a CSV with details of all depots involved in an optimization problem.
Preparing “Depot” CSV
Following section covers all the properties, along with their expected format, available for configuring a depot:
Item Name | Required | Description / Examples |
---|---|---|
ID | Yes | A unique identifier for the depot |
Description | No | Any custom description for the vehicle, maybe the name, label, function, vehicle type or anything. It should only be in text. |
Location | Yes | Provide the pickup location coordinates. You can either provide the latitude and longitude coordinates in separate columns or both of them together in a single column. While mapping, use the correct map keys to reflect the way in which locations have been added. |
Importing “Depots” CSV file
On the file import widget
- Navigate to the Depots section in the application.
- Click on the Upload a CSV button.
- In the pop-up window, select the CSV file with details of your depots.
- Click Open to start the import process.
Map Depot attributes to CSV columns
Upon importing the CSV file successfully, users should match the available depot attributes to the columns in the imported file. You can select the kind of information a CSV column represents, from the corresponding “Map Key” dropdown. This ensures the data is utilized correctly.
Depots attributes
Ensure that all columns are correctly filled with the right data and format, and there are no empty fields, as this may cause errors during import.
To reset the field mappings and create a new map between CSV and optimization fields click “Reset Field Mapping”. Else, click “Discard and Upload new file” to import a different file.
If there are any errors in the CSV file or the mapping during the import process, they will be highlighted for correction. Once all the errors are fixed, click “Next” to move the subsequent section.
Step 5: Upload “Vehicles” CSV
Adding the vehicles available for carrying out the configured “Jobs” & “Shipments” is a mandatory step to get an optimized route plan. This section will guide you on how to upload vehicle’s data and customize individual settings for each vehicle when building an optimization request.
Preparing “Vehicles” CSV
Before importing, ensure that the date in your CSV file is in the expected format. The file can include the following columns:
Item Name | Required | Description / Examples |
---|---|---|
Vehicle ID | Yes | A unique identifier for each vehicle. Supports text values. Example: “123” Example: Vehicle 1 |
Description | No | Any custom description for the vehicle, maybe the name, label, function, vehicle type or anything. It should only be in text. |
Capacities | The maximum load capacity of the vehicle. You can provide capacities in multiple units/dimensions (e.g., weight, volume etc) in separate columns and map these columns to “Capacity 1”, “Capacity 2” and so on while adding map keys. Supports integer values only. | |
Start Location | Provide the location from which the vehicle will start. You can either provide the latitude and longitude coordinates in separate columns or both of them together in a single column. While mapping, use the correct map keys to reflect the way in which locations have been added. This field is mandatory if the “End Location” field is not being provided. This field is mandatory if none of “End Location”, “Start Depot IDs”, or “End Depot IDs” fields are provided. | |
End Location | Provide the location from which the vehicle will start. You can either provide the latitude and longitude coordinates either in separate columns or the same one. While mapping, use the correct map keys to reflect the way in which locations have been added. This field is mandatory if none of “Start Location”, “Start Depot IDs”, or “End Depot IDs” fields are provided. | |
Shift Start time | The time after which the vehicle is available to start a route. Format: YYYY-MM-DD HH:mm | |
Shift End time | The time until which the vehicle is available for routing. Format: YYYY-MM-DD HH:mm | |
Max Tasks | The maximum number of tasks that a vehicle can perform. A job constitutes a single task whereas a shipment constitutes two tasks - one each for pickup and dropoff. Only integer values are supported. Example: 10 | |
Skills | The skills that the vehicle possesses. When optimizing, the app will assign tasks to only the vehicle(s) having all the required skills needed to fulfill a job. It can take integer values only. Example: 1 | |
Start Depot IDs | The depot ID from where the vehicle starts its route. The app assumes that in case of delivery tasks, the required items are loaded into the vehicle at the starting depot. If a vehicle can start from any one of multiple depots, add all such depot IDs in separate columns and use the map keys “Start Depot 1”, “Start Depot 2” and so on, as needed. Only integer values are supported. | |
End Depot IDs | The depot ID from where the vehicle ends its route. The app assumes that in case of pickups, the required items are dropped-off by the vehicle at the end depot. In case a vehicle can end its route at any one of multiple depots, add all such depot IDs in separate columns and use the map keys “End Depot 1”, “End Depot 2” and so on, as needed. Only integer values are supported. | |
Speed Factor | A positive number indicating the factor by which the vehicle's speed should be adjusted, relative to normal speed, affecting the driving durations consequently. When speed factor is greater than 1, effective travel time will be less than the normal travel duration. Similarly, when speed factor is less than 1, effective travel time will be more than the normal travel duration. Please note that the speed factor value supports values greater than 0 up to a maximum of 5.0, with a precision of two digits after the decimal point. Example: 2.5 | |
Fixed Cost | Specify a fixed cost incurred just by using the vehicle. It should be a positive integer. | |
Cost Per Hour | Specify the cost incurred per hour that the vehicle is driven. It should be a positive integer. The cost of the route is determined by using this value. Example: 550 | |
Cost per Km | Specify the cost incurred per kilometer that the vehicle travels. It should be a positive integer. The cost of the route is determined by using this value. Example: 100 | |
Max Travel Cost | Specify the maximum cost a vehicle can incur while on a trip.The metric used for identifying the travel cost can be determined/configured in the “Options” menu of the import widget. It should be a positive integer. Example: 1000 |
Importing “Vehicles” CSV file
On the file import widget
- Navigate to the Vehicles section in the application.
- Click on the Upload a CSV button.
- In the pop-up window, select the CSV file with details of your vehicles, prepared as per the guidelines in the previous section.
- Click Open to start the import process.
Map Vehicle attributes to CSV columns
Once a CSV file is successfully imported, you should match the available vehicle attributes to the columns in the imported file. You can select the kind of information a CSV column represents, from the corresponding “Map Key” dropdown. This ensures the data is utilized correctly.
Vehicles attributes
Ensure that all columns are correctly filled with the right data and format, and there are no empty fields, as this may cause errors during import.
To reset the field mappings and create a new map between CSV and optimization fields click “Reset Field Mapping”. Else, click “Discard and Upload new file” to import a different file.
After successfully importing the file and fixing errors, if any, click “Next” to move on to the next section of the request building process.
Step 6: Specify Optimization constraints
In this step, we configure the available constraints to achieve a desired solution. We have divided the constraints into the following 3 categories:
Constraint
Constraints relate to the hard and soft constraints that can be used to emulate real-world operating conditions while building the optimization problem. This section allows you to set:
-
Max_vehicle_overtime: The additional time, in seconds, for which a vehicle can operate beyond their shift timings. This is a soft constraint and applies to all vehicles specified in the problem. The optimizer will use the extra shift time only when necessary, as the first preference is to complete all assigned tasks within standard shift timings.
-
Max_vehicle_lateness: The additional time, in seconds, beyond a task’s time window during which they can be fulfilled. This is also a soft constraint and applies to all tasks in a given problem. The optimizer will use the extra time only when necessary, as the first preference is to complete all tasks within their original time windows.
-
Max_activity_waiting_time: The maximum time, in seconds, that a vehicle can wait for the task’s time window to begin so that it can be serviced. This is a hard constraint, meaning that if a vehicle needs to wait more than the input value, the optimizer will keep the task unassigned. This constraint applies to all tasks specified in the problem.
Objective
This section offers different options to tweak the optimization algorithm to achieve the required Objective.
Travel Cost
It helps choose the type of metric that should be considered when estimating the cost of the solution and the optimizer will prefer a solution with lower cost value.
As an example, if “Duration” is selected, then driving time of all the routes is used to determine the overall cost of the solution and a route with smaller drive time is preferred over other routes, subject to other constraints.
Users can select any one of “Distance”, “Duration” and “Air Distance” options.
Custom Object
In case the business scenarios are such that traditional minimization techniques are not good enough, NextBillion.ai Route Planner offers customized objectives to solve niche use-cases easily. With custom objectives, users can choose to either minimize or equally distribute a given metric.
Let’s take a look at the available options:
-
Type “min” - When using this value the algorithm minimized the selected metric. With this type users can choose to minimize either the number of “vehicles” used in the solution or the “completion_time” by which all the feasible tasks are fulfilled.
-
Type “min_max” - When using this value the algorithm aims for equal distribution of the selected metric. With this option, users can either go for equally distributing the “tasks” among all the routes or go for having similar “travel_cost” for all routes. The travel cost to be used is identified from the input of the “Travel Cost” field.
Routing
A set of constraints allowing you to set the following preferences related to routing:
- Mode: It is used to select the driving mode or the type of vehicles used in the optimization problem. If not specified, the default driving mode is “car”.
- Traffic Timestamp: Specify a departure time which is used to determine realistic ETAs and smart routes based on the typical traffic conditions at the given time.
Review and modify configured inputs
- Once all the CSV files are uploaded and optimization constraints specified, click “Finish Import”.
- The application generates a JSON automatically using configurations set during the import process. The JSON can be modified using the JSON editor for minor tweaks and updates.
- Click on the “Edit Input” button to go back to the CSV import widget to modify any settings.
- Click “Compile” to render the configuration of tasks and vehicles on the map to verify the inputs visually.
Review and Modify interactions
Generate and Read optimized solution
After reviewing the input, click on the “Run” button at the top right corner to generate the final solution.
Exploring Solutions page
On the “Solution” screen, you will see following components
- A map layout with all the planned routes.
- Request ID: A unique identifier for this solution. Users can retrieve this solution using its ID until the next 7 days.
- A panel on the left hand side with details about
- Routes: A summary of route with vehicle ID, start time, completion time, total distance, duration and service time of the route. Clicking on a card centers the map on the given route.
- Unassigned Jobs: Gives the details of tasks which remained unassigned along with a reason for it.
- When a route card from the left panel is clicked, the step-wise details of that route are listed on a scrollable panel on the right. It lists all the events - start, task fulfilments, break times and end - of the route in a chronological sequence along with relevant information about the event.
- Route Steps: A toggle to overlay the routes with the step count. This helps to understand the direction and flow of events on the route.
- Input Details: A toggle to display the task types, their locations and vehicles’ start locations on the map.
- Bookmark: A feature to save the current solution in the browser’s local storage.These solutions are available until the current session is alive.
- Notes: A feature to add personalized notes on the solution. These notes are available while the current session remains active.
- Share: A feature to share the solution. A solution can be shared to:
- Dispatch to Driver App: Dispatch the solution to NextBillion.ai Driver app. Drivers can log into their individual apps to access the individual route plans.
- Dispatch to a Connection: Dispatch the solution to a pre-integrated Telematics platform. To know more about available integrations, visit our Integration section.
- Download CSV: Download the solution in a CSV format.
- Share via URL: Generate a publicly shareable URL for the solution and share it with anybody in your team.