Samsara-Fleet Hub Integration
This integration document will walk you through the steps of integrating Samsara telematics with NextBillion.ai’s Fleet Hub, accessible via NextBillion.ai’s Cloud Console.
Prerequisites
Before proceeding with the integration, ensure that you have the following prerequisites in place:
- Access to a Samsara Account
- Access to a NextBillion.ai’s Cloud Console
Setting up the Connection
To establish the connection between Samsara and NextBillion.ai, follow these steps:
- Sign in to the NCC using your NextBillion.ai credentials.
- From the NCC homepage, open the left navigation pane.
- Select Fleet Hub, then choose Integrations under the Setup section.
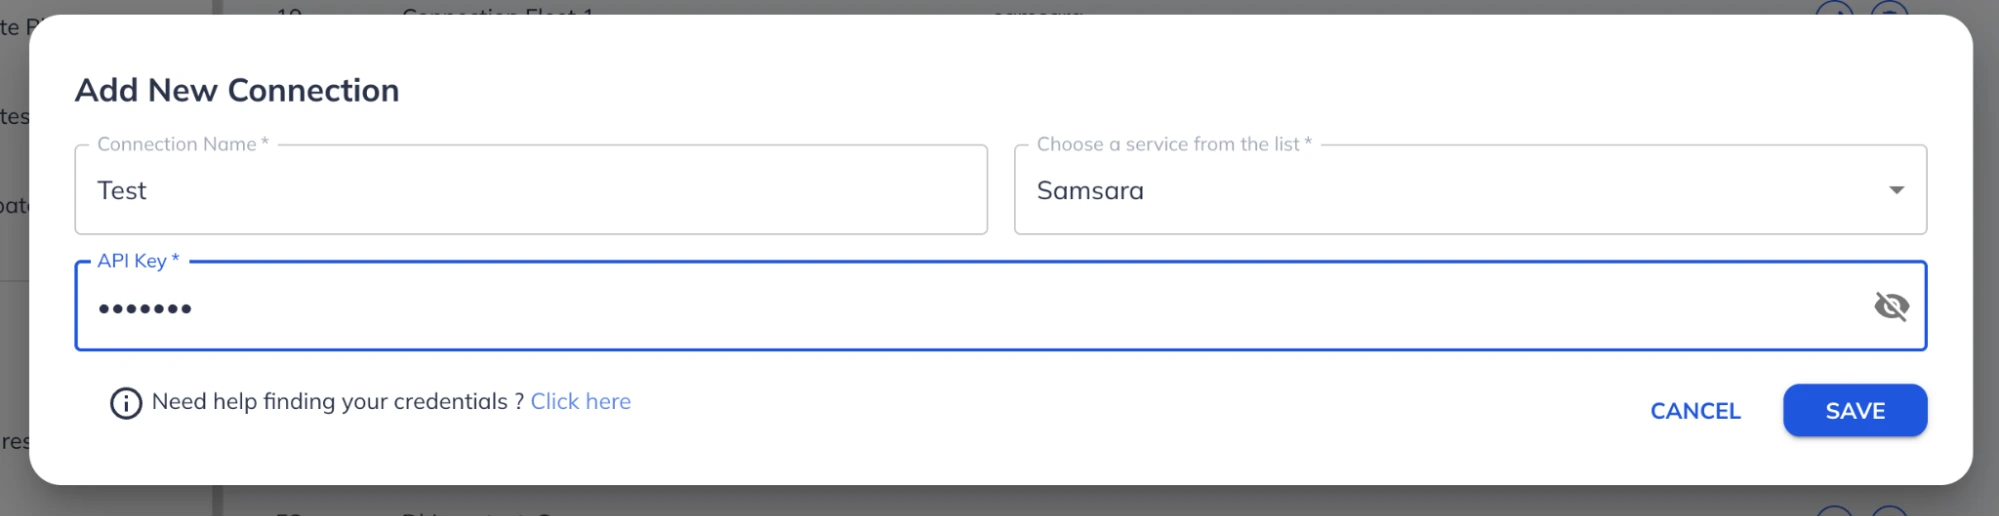
- On the Telematics Integration page, select Add New Connection.
- In the Add New Connection dialog box, enter the following information:
- Connection name: Enter a descriptive name for the integration.
- Choose a service from the list: Select Samsara from the dropdown menu.
- API key: Enter your Samsara API key.
- Select Save to complete the setup.
Upload Address and Vehicle Data
After setting up the connection, upload your address and vehicle data to the NextBillion.ai Cloud Console (NCC) by following these steps.
Upload Address Data
- In the left navigation pane, select Addresses under the Data section.
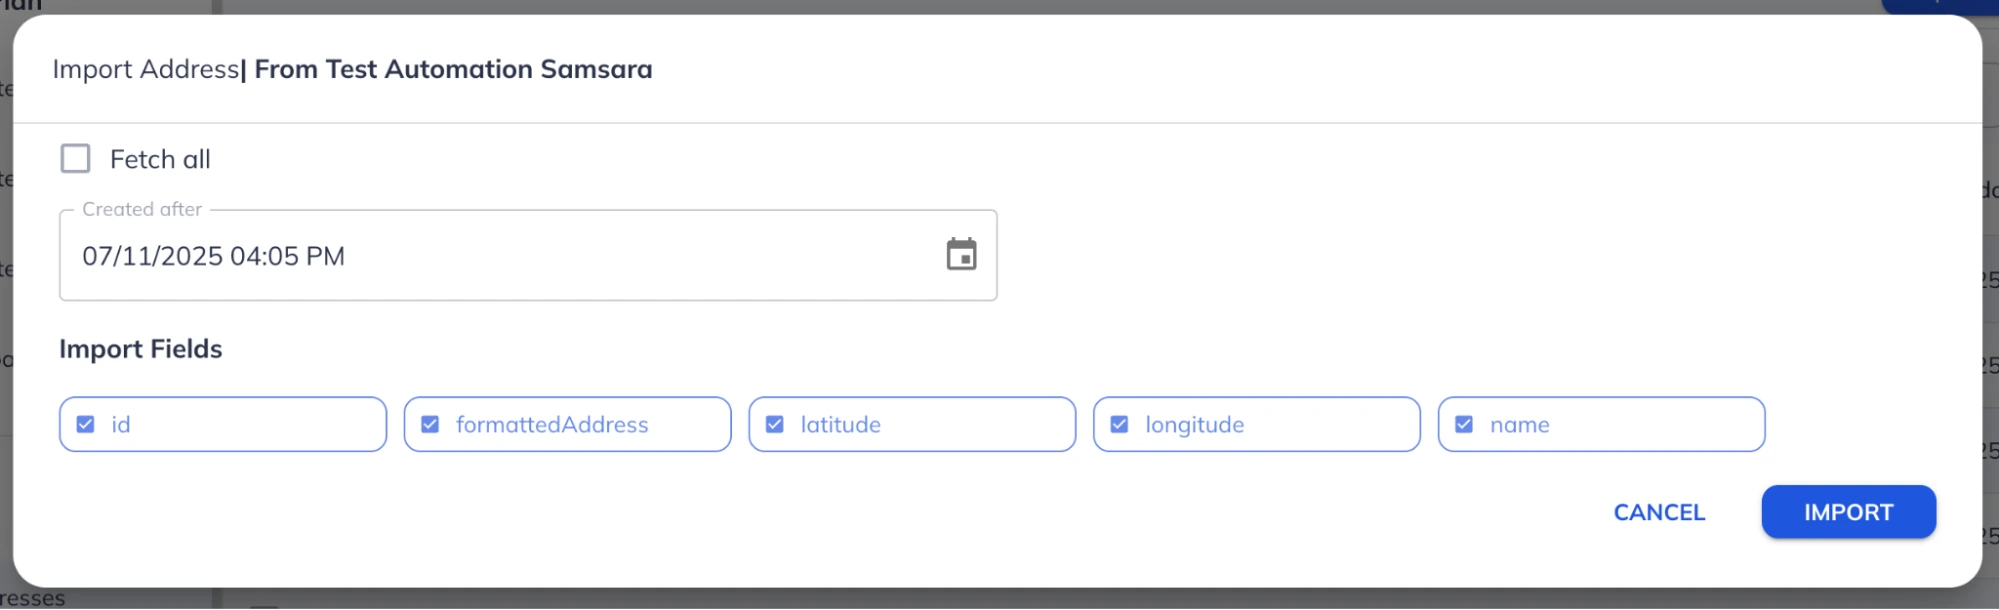
- On the Addresses page, select Import Data in the upper-right corner.
- In the From Connections dropdown, select the connection you created during setup.

- In the Import Addresses dialog box, configure the following options:
- Fetch all: Select this checkbox to import all available addresses.
- Created after: Optionally, specify a date and time to import only addresses created after that timestamp.
- Select Import to begin the import process. NCC will fetch and display address data from your Samsara account.
You have successfully set up the connection between your Samsara account and NextBillion.ai’s Fleet Hub.
Import Vehicle Data
- In the left navigation pane, select Vehicles under the Data section.
- On the Vehicles page, select Import Data in the upper-right corner.
- In the From Connections dropdown, select the connection you created during setup. NCC will automatically fetch and update all vehicle data from your Samsara account.

Use Route Planner to Generate Optimized Routes
Once address and vehicle data are imported, follow the steps below to generate optimized routes: Open the ‘Route Planner’ app from the left toolbar. Click ‘Start’ on the input screen.

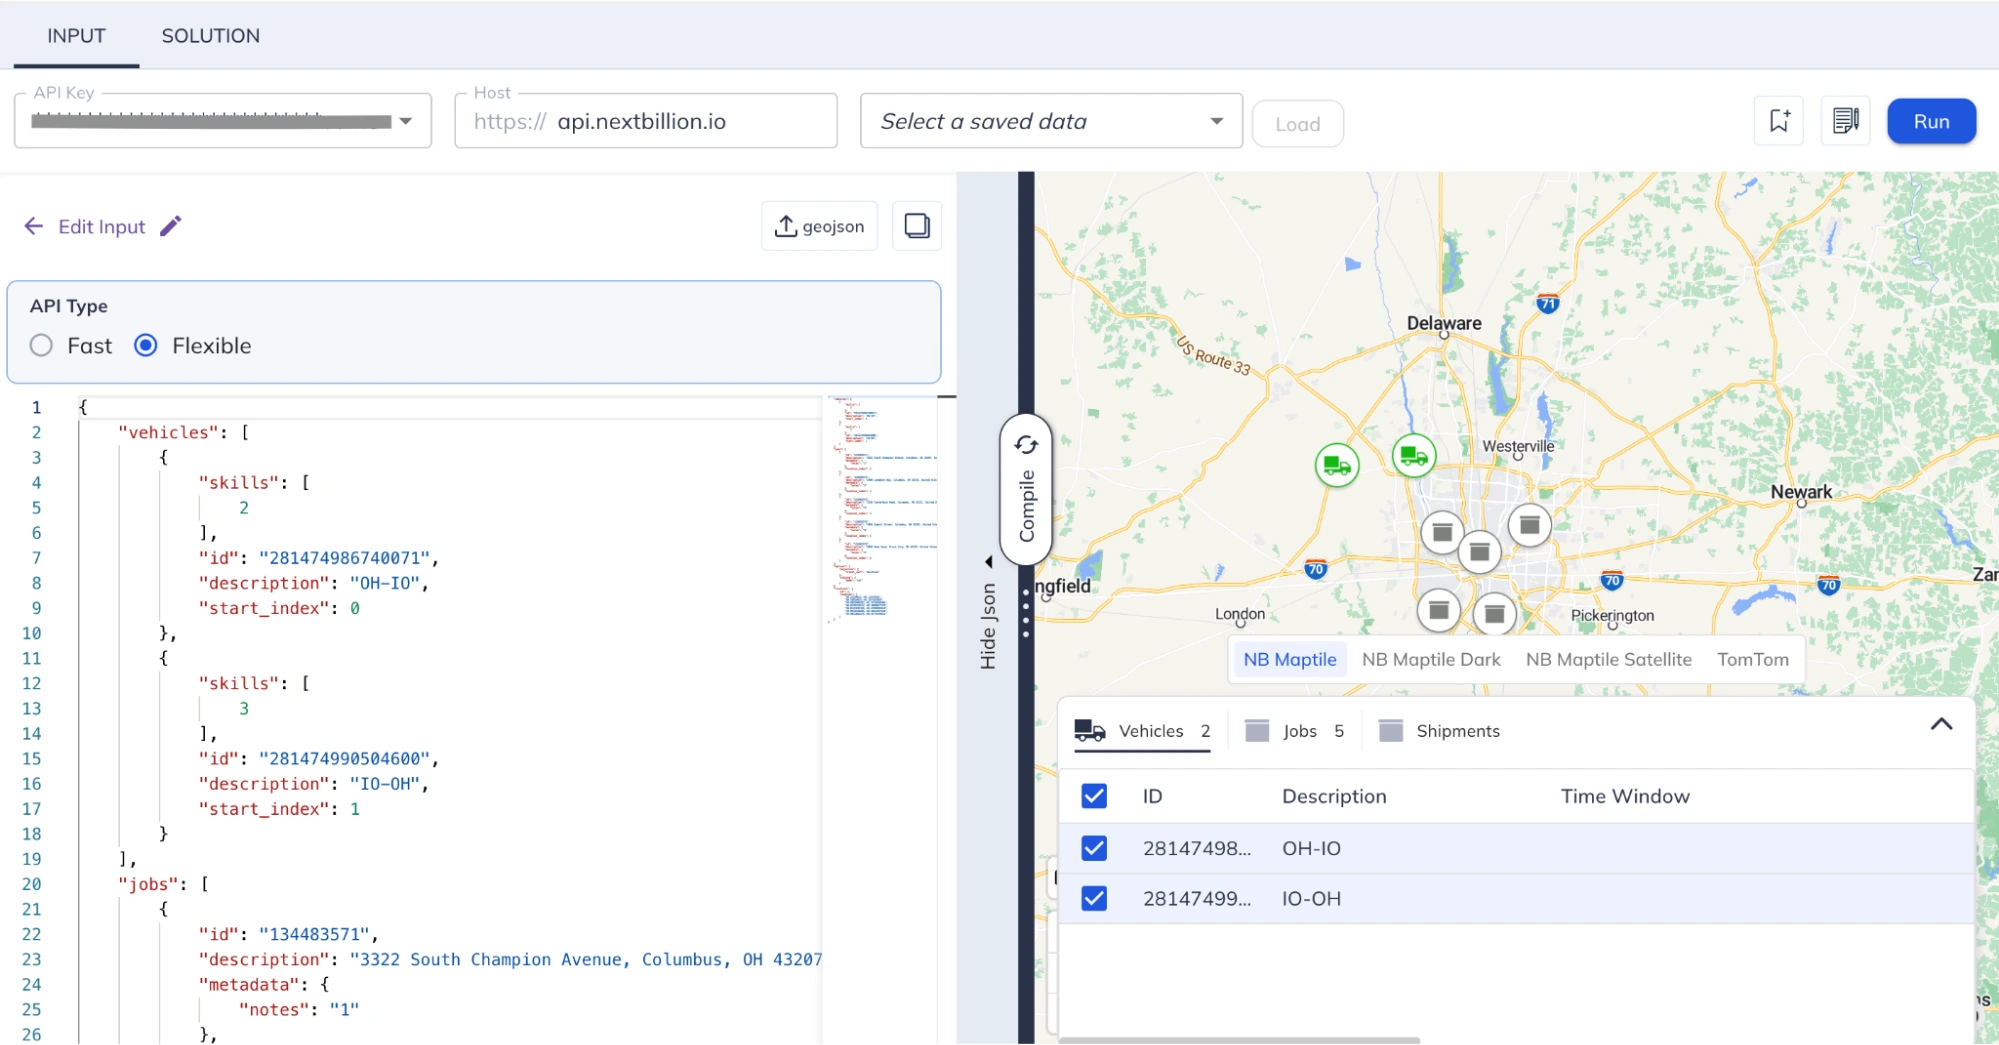
Configure Tab
- Select the API type: Fast or Flexible.
- Choose your Samsara connection from the ‘Select Connection’ dropdown.
- Click ‘Next’ to proceed.

Jobs Tab
- Use ‘Select Addresses’ to fetch addresses from Samsara.
- Choose the addresses you want to include and click ‘Upload’.

- Map the VRP attributes to match the uploaded data fields, then click ‘Next’.

Shipments and Depots Tab
Upload shipments and depot data as required or click ‘Skip’ if not needed.
Vehicles Tab
- Use ‘Select Vehicles’ to fetch vehicle data from Motive.
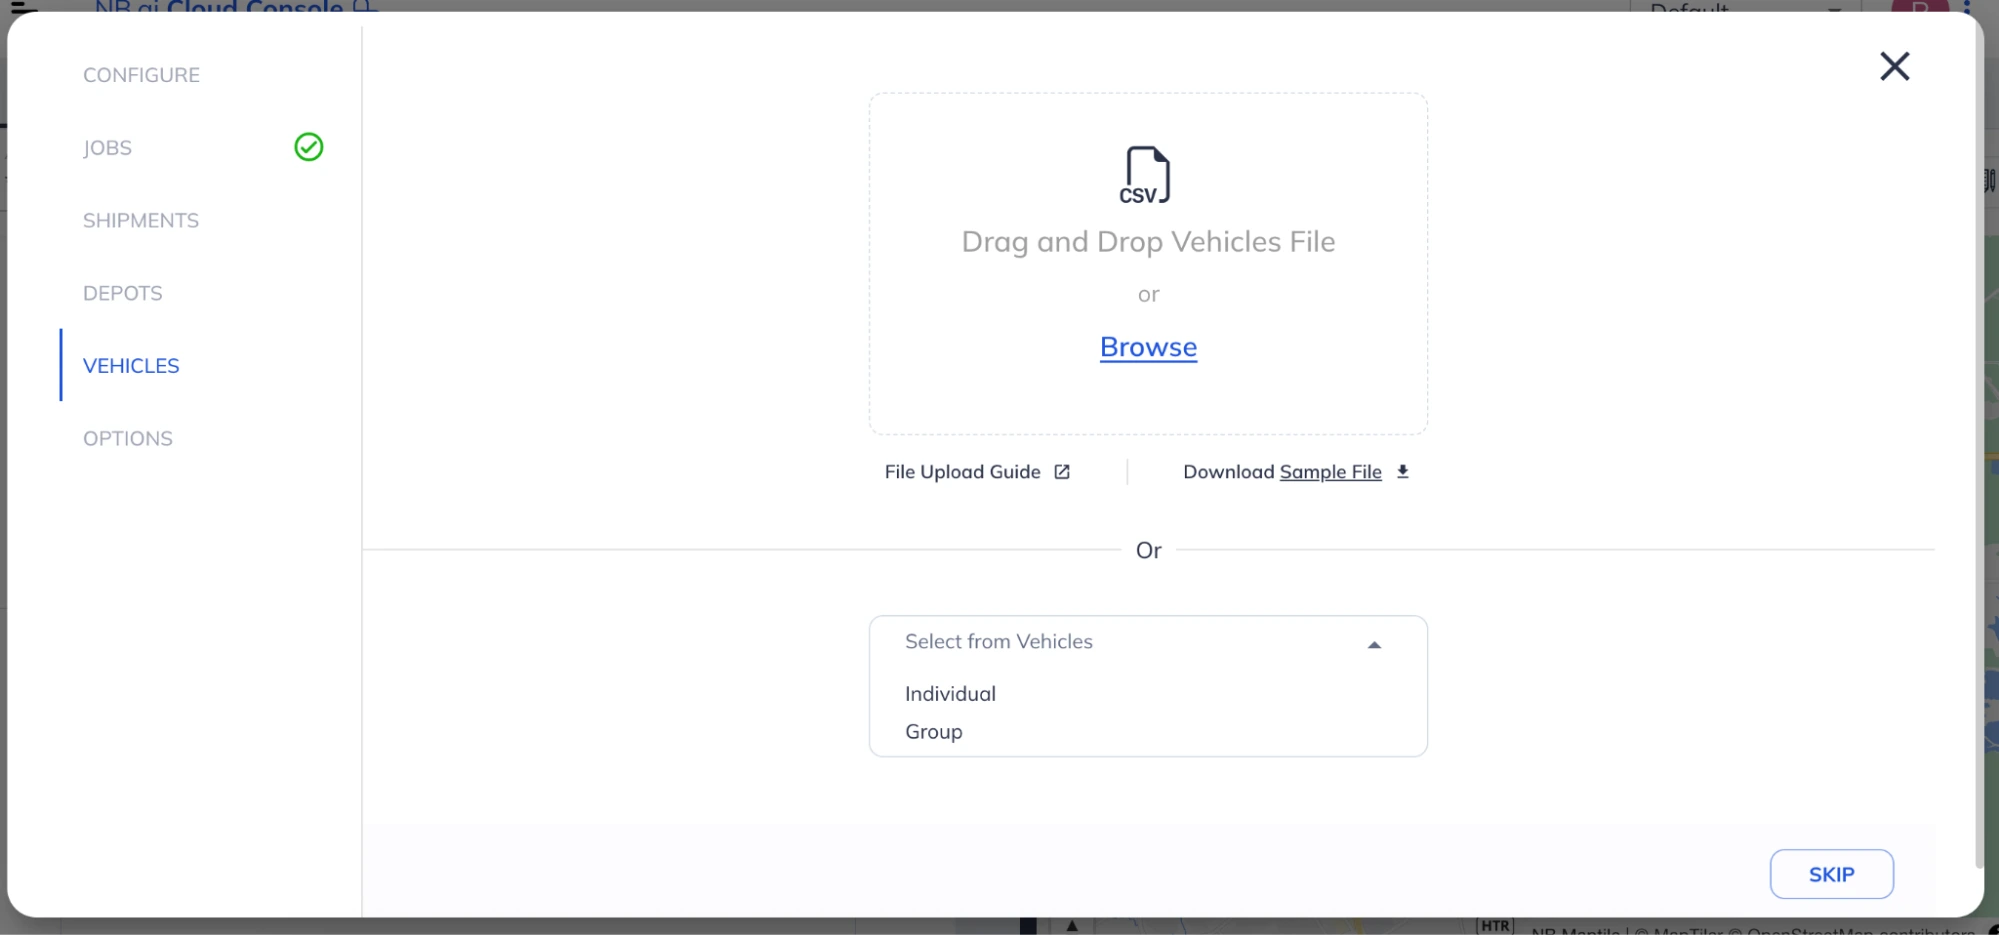
- Select the vehicles you want to use and click ‘Upload’.

- Map the VRP attributes and click ‘Next’.

Options Tab
Configure additional parameters such as:
- Constraints: Max vehicle overtime, max lateness, max waiting time.
- Objective: Minimize travel cost (distance/duration) or set a custom optimization goal.
- Routing Mode: Select Car or Truck and specify a Traffic Timestamp.
Click ‘Finish Import’ to finalize the setup.
Generate Optimized Routes
- Click ‘Compile’ to visualize routes on the map.
- Click ‘Run’ to execute the route planner and generate optimized routes.
Sharing Routes from Route Planner to Samsara
To share routes from Route Planner to Samsara, proceed as follows:
- View the optimized routes in Route Planner.
- Select the connection from the ‘Share’ section in Route Planner.
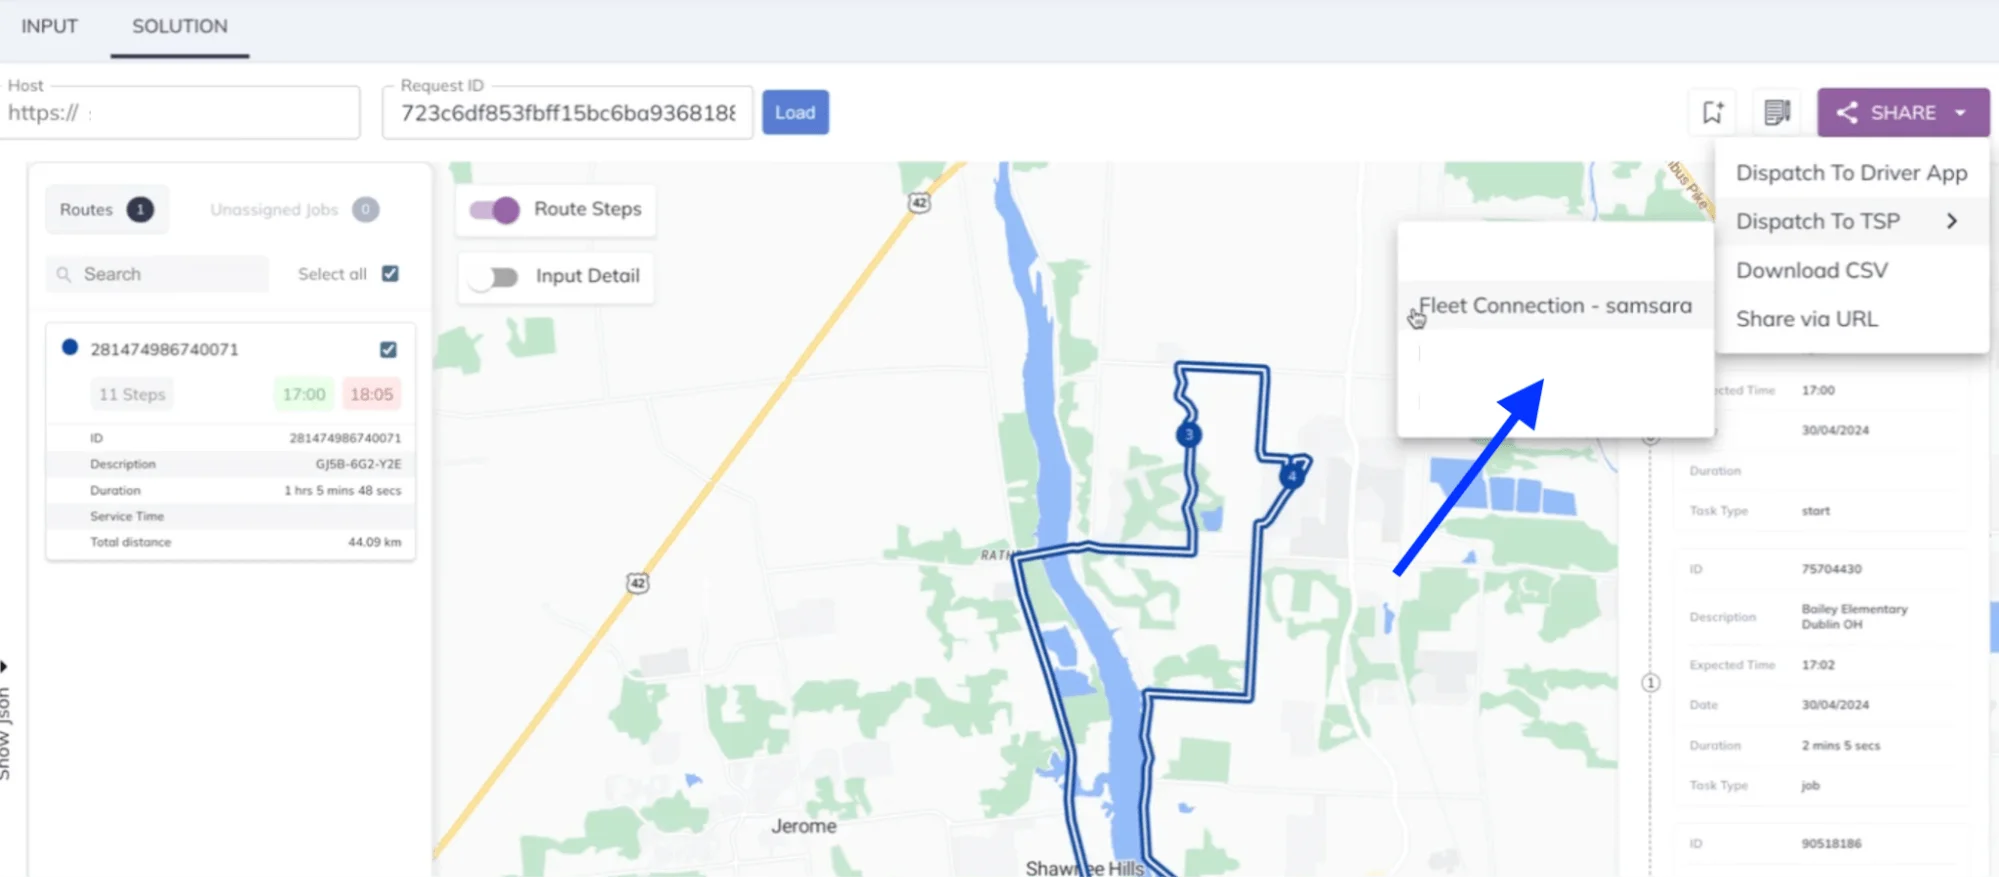
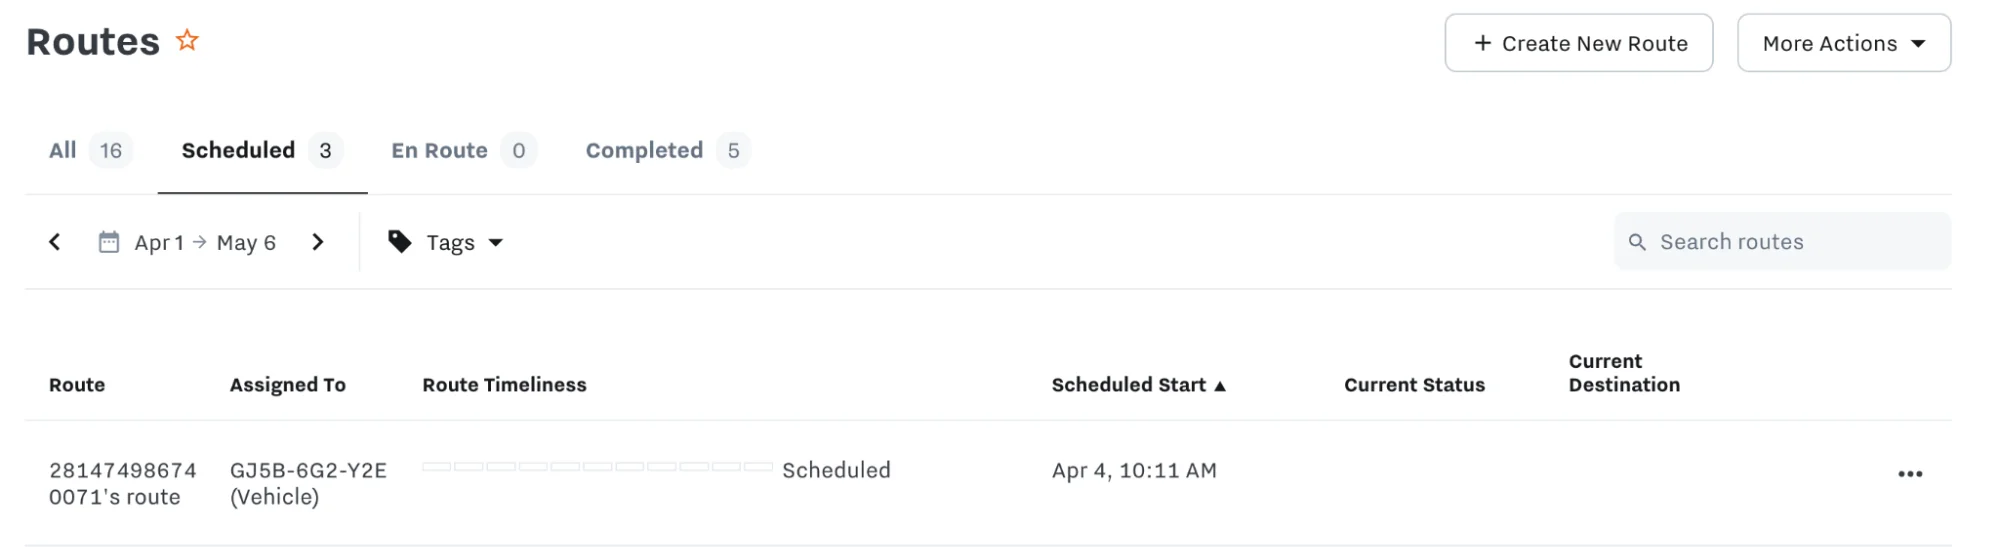
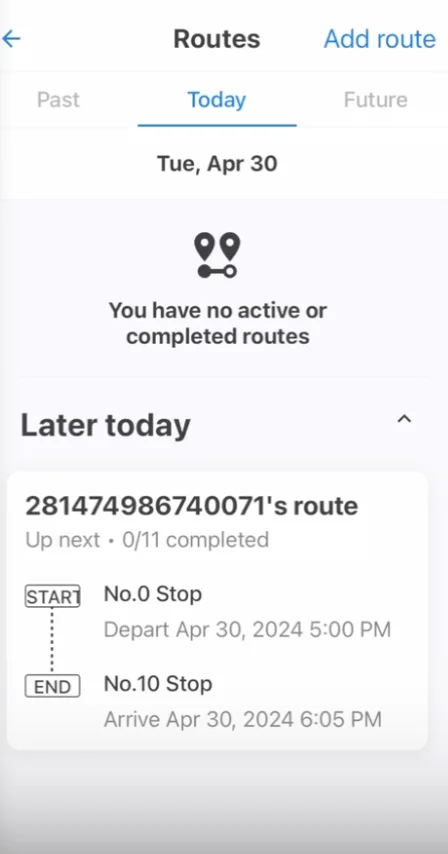
- This action will send the routes to the Samsara dashboard, where they will be assigned accordingly.
Vehicle Metadata
Add a “metadata” attribute for each vehicle to specify any custom vehicle data that should be attached along in the “routes” attribute of the optimized solution. Users can leverage this property to provide additional details/context when sharing vehicle information with integrated systems (TMS, Fleet Management, Driver dispatch etc).
Please note that the metadata content must always be specified in a “key : value” pair format, where the "key" is always a string.
Following is a sample vehicle configuration using the metadata attribute:
Example:
Job Metadata
Add a “metadata” attribute for each job to specify any custom data that should be attached along with its fulfillment details in the “steps” attribute of the optimized solution. Users can leverage this property to provide additional details/context when sharing information about the job with integrated systems (TMS, Fleet Management, Driver dispatch etc). Please note that the metadata content must always be specified in a “key : value” pair format, where the "key" is always a string.
In order to relay the information for specific fields in Samsara - Job name, address, and notes - we recommend users to add these fields in job’s metadata attribute exactly like the below sample:
Shipment Metadata
Add “metadata” attribute at each shipment level to specify any custom data that should be attached along with shipment fulfillment details in the “steps” attribute of the optimized solution. Users can leverage this property to provide additional details/context when sharing information about the shipment with integrated systems (TMS, Fleet Management, Driver dispatch etc). Please note that the metadata content must always be specified in a “key : value” pair format, where the "key" is always a string.
In order to relay the information for specific fields in Samsara - shipment name, address, and notes - we recommend users to add these fields in job’s metadata attribute exactly like the below sample:
Following is a complete request with metadata and description fields configured such that they will auto populate the Samsara fields.