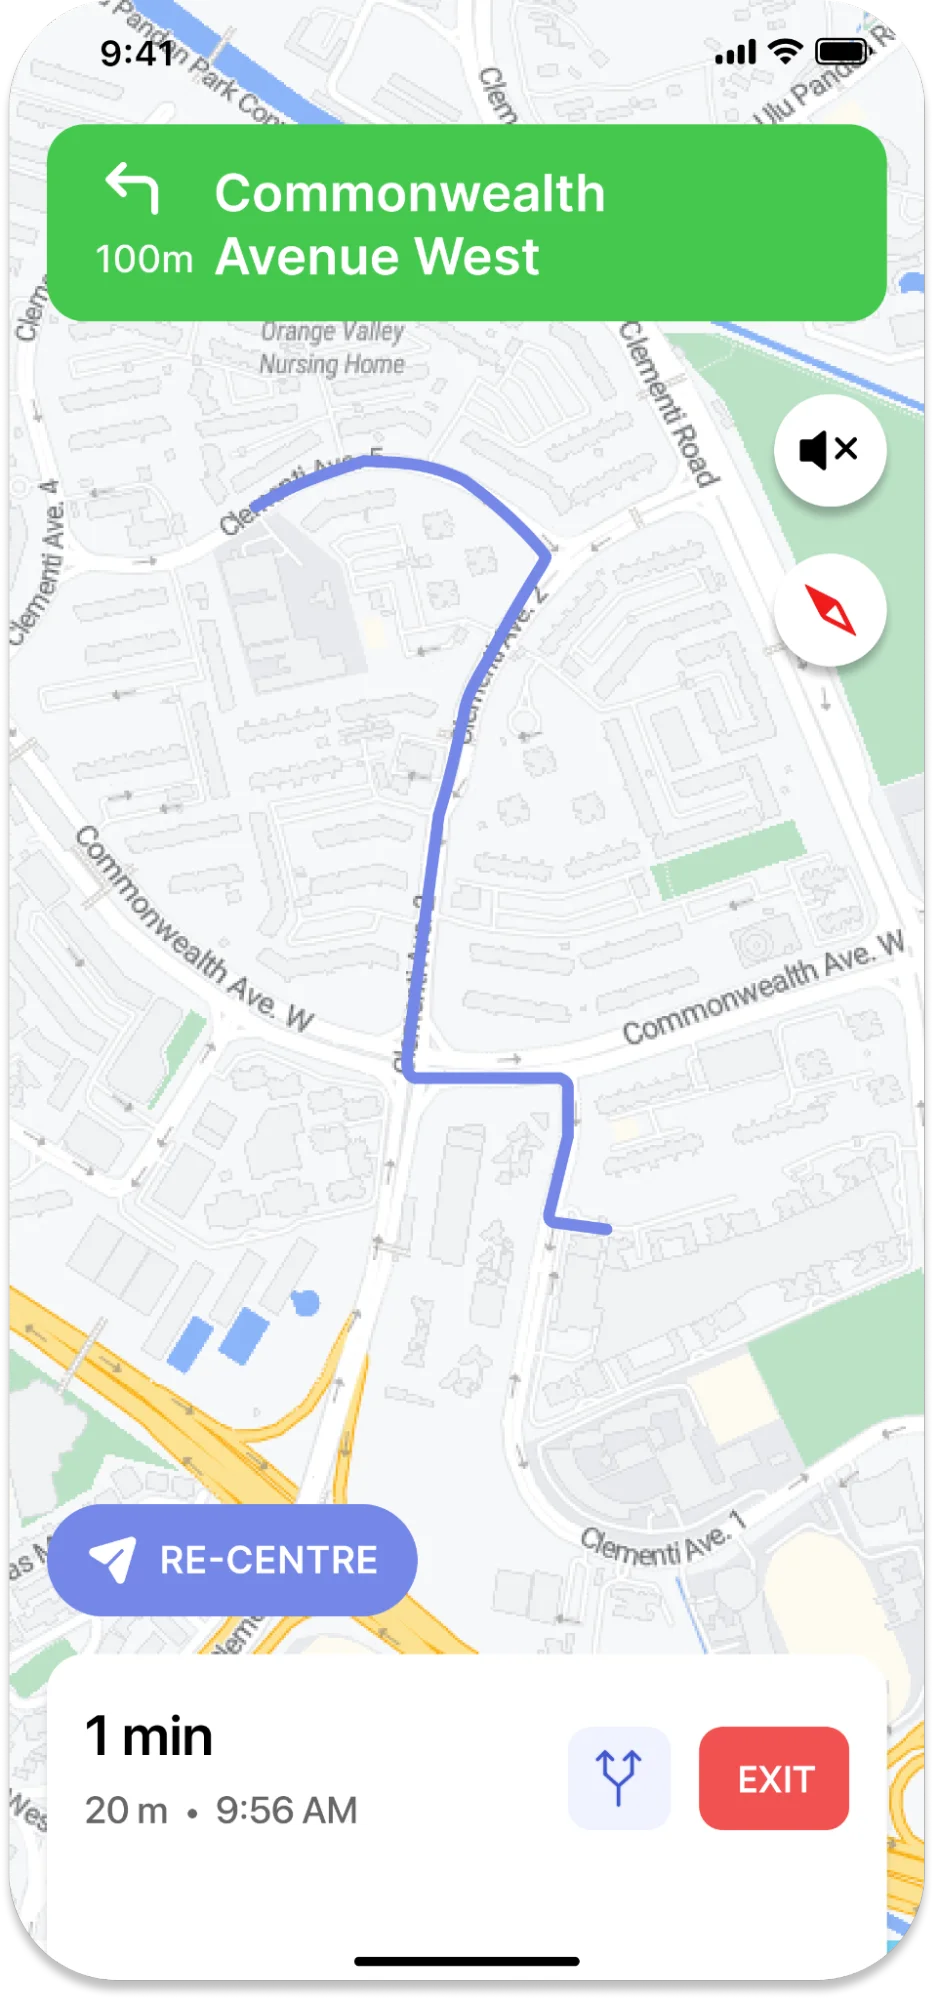
Map Display and Navigation

Generally, a navigation application comprises two pages incorporating a map view. We will refer to this setup as a standalone navigation view.

Users can designate the destinations or waypoints on the initial page, which they intend to traverse. Simultaneously, a route is obtained and displayed within the map view. Upon selecting "start navigation," the application transitions to the second page, providing a comprehensive navigation experience.

In certain scenarios, product designers may prefer to consolidate waypoint selection and navigation initiation onto a single page. We will refer to this alternative as the embedded navigation view. While this approach is discussed in other sections, the present section focuses on the conventional case (i.e., the standalone navigation view).

To embark on your first navigation experience, construct a page for plotting waypoints and execute an HTTP request to acquire a route. Subsequently, access the built-in navigation page by invoking the SDK API.

First Page

Integrate a map view

Normally, we only initialize NavigationMapView once, so we call it in viewDidLoad()

1
var mapView: NavigationMapView?
2
//init navigationMapView within viewDidLoad() method
3
override func viewDidLoad() {
4
super.viewDidLoad()
5
self.mapView = NavigationMapView(frame: view.bounds)
6
//configure for mapView based on your needs
7
mapView.autoresizingMask = [.flexibleWidth, .flexibleHeight]
8
mapView.userTrackingMode = .follow
9
mapView.logoView.isHidden = false
10
mapView.compassView.isHidden = false
11
mapView.styleURL = URL(string: mapStyleUrl)!
12
13
//Assign Your ViewController as the delegate of navigationMapView
14
mapView.navigationMapDelegate = self
15
self.view.insertSubview(mapView, at: 0)
16
}
17
18
//Extend YourViewController to adhere to the NavigationMapViewDelegate
19
extension YourViewController: NavigationMapViewDelegate {
20
//Implement the functions of delegate based on your needs
21
}

Get the user’s current location

To obtain users’ geographic location, we are using Core Location Service via instances of CLLocationManager, in our SDK we can leverage NavigationLocationManager to determine users’ location.

1
let locationManager = NavigationLocationManager()
2
CLLocation location = locationManager.location
3
//if the return location of the previous code is nil, we can call requestLocation to force a request for a location
4
locationManager.requestLocation()
5
// we can also call locationManager.startUpdatingLocation() to Start the generation of update of user’s current location, and call locationManager.stopUpdatingLocation() to stop.

On the other hand, you can also implement CLLocationManager’s delegation to manage user location, for more details please refer to Apple’s official docs

Fetch a route

How to fetch a route

1
// Initialize the route options with the start and end waypoints
2
let options = RouteOptions.init(origin: startWaypoint, destination: endWaypoint)
3
4
// Include alternative routes in the response
5
options.includesAlternativeRoutes = true
6
7
// Set the road classes to avoid as an empty array
8
options.roadClassesToAvoid = []
9
10
// Set the measurement system to metric
11
options.distanceMeasurementSystem = MeasurementSystem.metric
12
13
// Calculate the directions based on the provided options
14
Directions.shared.calculate(options) { [weak self] routes, error in
15
// Check if there was an error during the calculation
16
guard error == nil else {
17
// Handle the error here if it exists
18
return
19
}
20
21
// Display the routes, waypoints, and duration symbols on the map
22
guard let weakSelf = self else {
23
return
24
}
25
weakSelf.mapView?.showRoutes(routes)
26
weakSelf.mapView?.showWaypoints(current)
27
weakSelf.mapView?.showRouteDurationSymbol(routes)
28
}

Start navigation

Once we have fetched routes, we need to construct a NavigationOptions to build a NavigationViewController, and then call UIViewController’s present function to display NavigationView.

1
// Initialize the navigation service with the fetched routes and set the primary route to the first index
2
let navigationService = NBNavigationService(routes: routes, routeIndex: 0)
3
4
// Initialize the day and night styles for navigation, or use custom styles if available
5
let styles = [DayStyle(), NightStyle()]
6
let navigationOptions = NavigationOptions(styles:styles, navigationService: navigationService)
7
8
// Initialize the NavigationViewController with the provided routes and navigation options
9
let navigationViewController = NavigationViewController(for: routes, navigationOptions: navigationOptions)
10
11
// Set the delegate of the NavigationViewController to subscribe to NavigationView's events (optional)
12
navigationViewController.delegate = self
13
14
// Set the presentation style of the NavigationViewController to full-screen
15
navigationViewController.modalPresentationStyle = .fullScreen
16
17
// Present the NavigationViewController to start the navigation
18
present(navigationViewController, animated: true) {
19
}

And there we go:

docs-image

© 2024 NextBillion.ai all rights reserved.