# Get Started
This section is designed to help developers quickly and easily get up and running with the Navigation SDK. It covers the prerequisites and requirements for using the SDK, as well as detailed installation instructions and information on Maven dependencies. By following the steps outlined in this section, developers can quickly set up the Navigation SDK and start building engaging navigation experiences for their users. Additionally, it includes a Quickstart guide to creating a simple navigation app using the SDK, allowing developers to quickly see the Navigation SDK in action and get a feel for its capabilities.
## Prerequisites and requirements for using the SDK
Our Android Navigation SDK require the following prerequisites:
- Access Key: if you don’t have your Access Key yet, don’t hesitate to [contact us](https://nextbillion.ai/contact-us?utm_source=footer&utm_medium=docs&utm_campaign=onpage)
- IDE (Android Studio): to build and develop the Android application
- Use the latest stable Android Studio version recommended by Google
- Navigation SDK’s Android SDK levels
- minSdkVersion 23
- targetSdkVersion 34
- compileSdkVersion 34
- Use the Google Play services location version compatible with your project and this SDK release. Refer to the latest release notes for the recommended version.
### Installation instructions
The section explains how to install the SDK by adding the necessary dependencies to your project. It provides instructions on adding the maven dependencies of SDK to your app's build.gradle file.
#### Maven Dependencies
Add the NextBillion Android Navigation SDK dependency in your app-level build.gradle file.
```gradle
dependencies {
def version = "2.7.1"
implementation "ai.nextbillion:nb-navigation-android:$version"
}
```
It is recommended to use a single version policy: set `def version = "2.7.1"` and keep all explanatory text aligned with that version.
Since the Gradle file has been edited. Android Studio will ask you whether to sync the files or not. Select Yes, and sync the Gradle files for successful installation of Android Navigation SDK.
### Initialization
The Navigation SDK is dependent on the Maps SDK, before we start using any functionalities from both SDKs, we need to initialize the Maps SDK first.
Initializing means passing your Access Key to the singleton method of the class Nextbillion, A common way to initialize the SDK is to put the following code in an application’s **onCreate()** callback.
Otherwise, please make sure you have called the code below before using any SDK functionalities.
```java
Nextbillion.getInstance(getApplicationContext(), "your access key");
```
If your project does not have an Application class, call initialization before invoking any SDK APIs (route fetching, NavigationLauncher, embedded NavigationView, or map rendering).
### Add Permissions
To use all functions of Navigation SDK, you need to declare the required permissions in the AndroidManifest.xml file
```xml
// Runtime permissions
```
#### Requesting Runtime Permissions in Your App:
Request runtime permissions in your app before starting navigation. At minimum, request foreground location; request background location and notifications only when those features are used.
```java
// Check if the ACCESS_FINE_LOCATION permission is granted
if (ContextCompat.checkSelfPermission(this.getApplicationContext(),
Manifest.permission.ACCESS_FINE_LOCATION)
== PackageManager.PERMISSION_GRANTED) {
mLocationPermissionGranted = true;
} else {
// Request the location permission
ActivityCompat.requestPermissions(this,
new String[]{Manifest.permission.ACCESS_FINE_LOCATION},
PERMISSIONS_REQUEST_ACCESS_FINE_LOCATION);
}
// If permission isn't granted, show an error message
if (!mLocationPermissionGranted) {
displayMessage("Error loading Navigation SDK: "
+ "The user has not granted location permission.");
return;
}
```
#### Handling Permissions on Android 14 (API 34) and Above:
For Android 14+ foreground navigation, declare FOREGROUND_SERVICE_LOCATION in AndroidManifest and configure the foreground service type correctly. Request runtime permissions according to your app flow for location/notifications.
```java
// Check for FOREGROUND_SERVICE_LOCATION permission (API 34+)
if (Build.VERSION.SDK_INT >= Build.VERSION_CODES.UPSIDE_DOWN_CAKE) { // Android 14+
if (ContextCompat.checkSelfPermission(this, Manifest.permission.FOREGROUND_SERVICE_LOCATION)
!= PackageManager.PERMISSION_GRANTED) {
ActivityCompat.requestPermissions(this,
new String[]{Manifest.permission.FOREGROUND_SERVICE_LOCATION},
REQUEST_FOREGROUND_SERVICE_LOCATION);
}
}
```
#### Handling Background Location Permission (Android 10+):
If your app needs to provide navigation prompts in the background, you need to request the `ACCESS_BACKGROUND_LOCATION` permission for Android 10 and above.
```java
// Check for ACCESS_BACKGROUND_LOCATION permission (Android 10+)
if (Build.VERSION.SDK_INT >= Build.VERSION_CODES.Q) { // Android 10+
if (ContextCompat.checkSelfPermission(this, Manifest.permission.ACCESS_BACKGROUND_LOCATION)
!= PackageManager.PERMISSION_GRANTED) {
ActivityCompat.requestPermissions(this,
new String[]{Manifest.permission.ACCESS_BACKGROUND_LOCATION},
REQUEST_BACKGROUND_LOCATION_PERMISSION);
}
}
```
#### Handling Notification Permission (Android 13+):
If you want your app to send turn-by-turn notifications while running in the background, you need to request the `POST_NOTIFICATIONS` permission on Android 13 (API 33) and above.
```java
// Check for POST_NOTIFICATIONS permission (Android 13+)
if (Build.VERSION.SDK_INT >= Build.VERSION_CODES.TIRAMISU) { // Android 13+
if (ContextCompat.checkSelfPermission(this, Manifest.permission.POST_NOTIFICATIONS)
!= PackageManager.PERMISSION_GRANTED) {
ActivityCompat.requestPermissions(this,
new String[]{Manifest.permission.POST_NOTIFICATIONS},
REQUEST_NOTIFICATION_PERMISSION);
}
}
```
#### Handling Permission Request Results:
Use Activity Result API as the primary permission-result handling approach. Keep onRequestPermissionsResult only for backward compatibility if required.
```java
@Override
public void onRequestPermissionsResult(int requestCode, @NonNull String[] permissions, @NonNull int[] grantResults) {
super.onRequestPermissionsResult(requestCode, permissions, grantResults);
if (grantResults.length == 0) {
// Handle the case where the user closed the permission dialog without making a choice
Toast.makeText(this, "Permission request was canceled", Toast.LENGTH_SHORT).show();
return;
}
switch (requestCode) {
case REQUEST_LOCATION_PERMISSION:
handlePermissionResult(grantResults[0], "Location permission is required for this demo");
break;
case REQUEST_BACKGROUND_LOCATION_PERMISSION:
handlePermissionResult(grantResults[0], "Background location permission is required if you run navigation in the background");
break;
case REQUEST_FOREGROUND_SERVICE_LOCATION:
handlePermissionResult(grantResults[0], "Foreground location service permission is required if you run navigation in the foreground");
break;
case REQUEST_NOTIFICATION_PERMISSION:
handlePermissionResult(grantResults[0], "Notification permission is required if you run navigation in the background");
break;
}
}
/**
* Helper method to handle permission results.
*/
private void handlePermissionResult(int grantResult, String denialMessage) {
if (grantResult != PackageManager.PERMISSION_GRANTED) {
// Show a message if permission is denied
Toast.makeText(this, denialMessage, Toast.LENGTH_LONG).show();
}
}
```
### Quickstart Guide
A complete turn-by-turn experience using the default NavigationLauncher
This example shows how to launch Navigation using _NavigationLauncher_
- How to fetch a route using _NBNavigation.fetchRoute_ with origin and destination
- How to config _NavLauncherConfig_ and launch Navigation using _NavigationLauncher_ with the given route
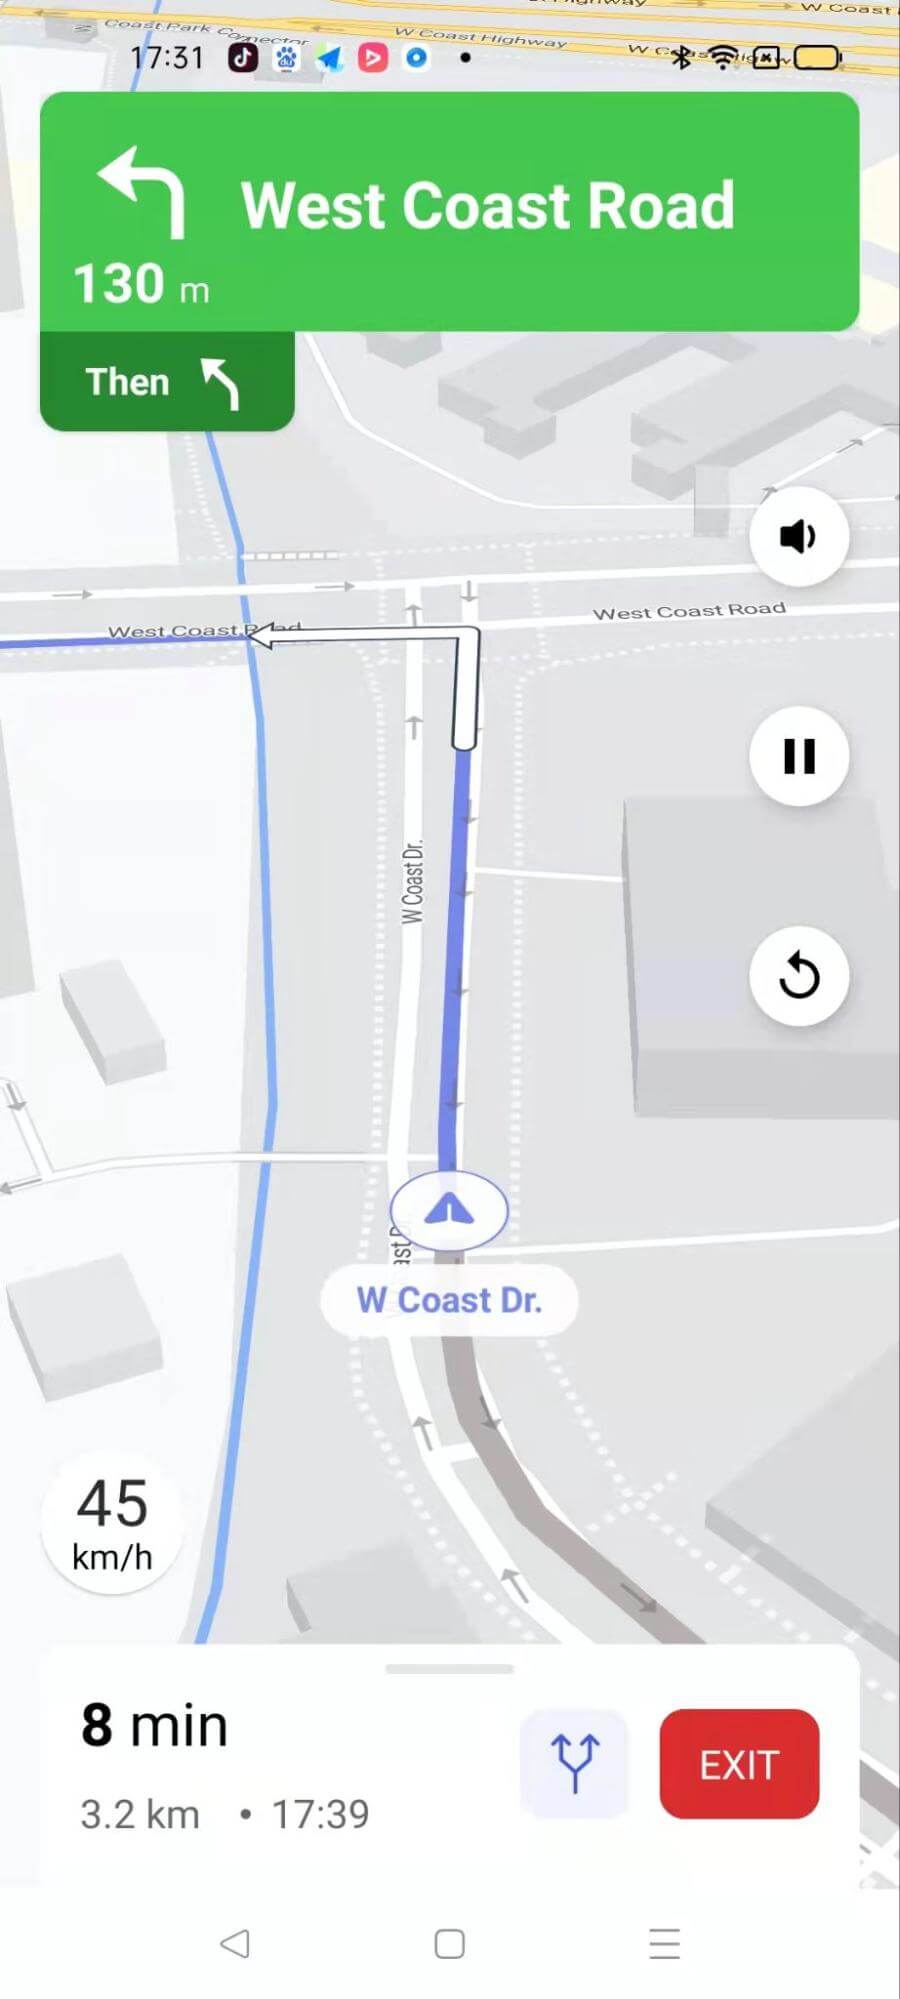
For all code examples, refer to [Navigation Code Examples](https://github.com/nextbillion-ai/nb-navigation-android-demo)
**activity_main.xml [view source](https://github.com/nextbillion-ai/nb-navigation-android-demo/blob/main/app/src/main/res/layout/activity_main.xml)**
```xml
```
**NavigationActivity [view source](https://github.com/nextbillion-ai/nb-navigation-android-demo/blob/main/app/src/main/java/ai/nextbillion/navigation/demo/activity/NavigationActivity.java)**
```java
package ai.nextbillion.navigation.demo.activity;
import android.os.Bundle;
import android.view.View;
import android.widget.Button;
import android.widget.ProgressBar;
import android.widget.TextView;
import ai.nextbillion.kits.directions.models.DirectionsResponse;
import ai.nextbillion.kits.directions.models.DirectionsRoute;
import ai.nextbillion.kits.geojson.Point;
import ai.nextbillion.maps.location.modes.RenderMode;
import ai.nextbillion.navigation.demo.R;
import ai.nextbillion.navigation.ui.NBNavigation;
import ai.nextbillion.navigation.ui.NavLauncherConfig;
import ai.nextbillion.navigation.ui.NavigationLauncher;
import androidx.annotation.NonNull;
import androidx.appcompat.app.AppCompatActivity;
import retrofit2.Call;
import retrofit2.Callback;
import retrofit2.Response;
public class NavigationActivity extends AppCompatActivity implements View.OnClickListener {
private Button fetchRoute;
private Button startNav;
private TextView routeGeometry;
private DirectionsRoute directionsRoute;
private ProgressBar progress;
@Override
protected void onCreate(Bundle savedInstanceState) {
super.onCreate(savedInstanceState);
setContentView(R.layout.activity_main);
fetchRoute = findViewById(R.id.fetchRoute);
startNav = findViewById(R.id.startNav);
routeGeometry = findViewById(R.id.routeGeometry);
progress = findViewById(R.id.progress);
fetchRoute.setOnClickListener(this);
startNav.setOnClickListener(this);
startNav.setEnabled(false);
}
@Override
public void onClick(View view) {
if (view.getId() == R.id.fetchRoute) {
progress.setVisibility(View.VISIBLE);
Point origin = Point.fromLngLat(103.75986708439264, 1.312533169133601);
Point destination = Point.fromLngLat(103.77982271935586, 1.310473772283314);
NBNavigation.fetchRoute(origin, destination, new Callback() {
@Override
public void onResponse(@NonNull Call call, @NonNull Response response) {
progress.setVisibility(View.GONE);
//start navigation with the route we just fetched.
if (response.body() != null && !response.body().routes().isEmpty()) {
directionsRoute = response.body().routes().get(0);
routeGeometry.setText(String.format("Route Geometry: %s", directionsRoute.geometry()));
startNav.setEnabled(true);
}
}
@Override
public void onFailure(@NonNull Call call, @NonNull Throwable t) {
progress.setVisibility(View.GONE);
}
});
} else if (view.getId() == R.id.startNav) {
NavLauncherConfig.Builder configBuilder = NavLauncherConfig.builder(directionsRoute);
configBuilder.locationLayerRenderMode(RenderMode.GPS);
configBuilder.shouldSimulateRoute(true);
NavigationLauncher.startNavigation(NavigationActivity.this, configBuilder.build());
}
}
}
```
#### Code Highlights
The example code represents a _NavigationActivity_ class that allows users to fetch a route and start navigation using the _NavigationLauncher_ class provided by the navigation SDK.
#### Code Explanation
The code example defines a layout file **activity_main.xml** that contains a vertical **LinearLayout** with two Button views (_fetchRoute_ and _startNav_), a **TextView** (_routeGeometry_), and a **ProgressBar**(_progress_).
The associated Java class _NavigationActivity_ extends _AppCompatActivity_ and implements the `OnClickListener` interface. In the `onCreate` method, the layout elements are initialized and click listeners are set for the buttons.
When the `fetchRoute` button is clicked, a network request is made using the _NBNavigation_ class to fetch a route between two geographic points (origin and destination). The response is received asynchronously in the `onResponse` callback. If the response is successful and contains at least one route, the first route is stored in the `directionsRoute` variable, and its geometry is displayed in the `routeGeometry` text view. The `startNav` button is enabled to allow navigation to be started.
When the `startNav` button is clicked, a _NavLauncherConfig_ is created with the stored `directionsRoute` and some configuration options. The navigation is then started using the _NavigationLauncher.startNavigation_ method.
#### Code summary
Fetch a route
- Using the _NBNavigation.fetchRoute_ method to retrieve the directions response for the given **origin** and **destination** points. If the response is successful and it will contain at least one route
Start navigation
- _NavLauncherConfig_ object is created with the previously fetched route and additional configuration options such as location layer render mode and route simulation. The _NavigationLauncher.startNavigation_ method is called to start the navigation activity with the provided configuration.